Centre Wall Hanging Pattern Using Double Half Hitch Knots
DIY Macrame Tutorial: Centre Wall Hanging Pattern Using Double Half Hitch Knots!
Please see below for materials and written instructions.
Material:
- 4mm String (Colour: Natural)
Shop Fiber Art Supples
Hey guys! I have a fun tutorial today that will show you how to create a centre pattern that you could incorporate into your wall hanging. Something like this would look great with a few more layers added to the sides and then brought together in the front of your work. Let’s get started.
Set-up - cut one piece of string that is 6ft in length. Cut 12 pieces of string that are 4 ft in length and set aside. Fold your piece of 6ft string so that there is 2ft on the left side and 4 ft on the right side and attach it to the left side of your dowel using a Lark’s Head knot. Attach it to the right side of your dowel using a Lark’s head knot.
Attach the remaining 12 pieces of string to the middle section by folding each piece in half and attaching using a Lark’s Head knot.
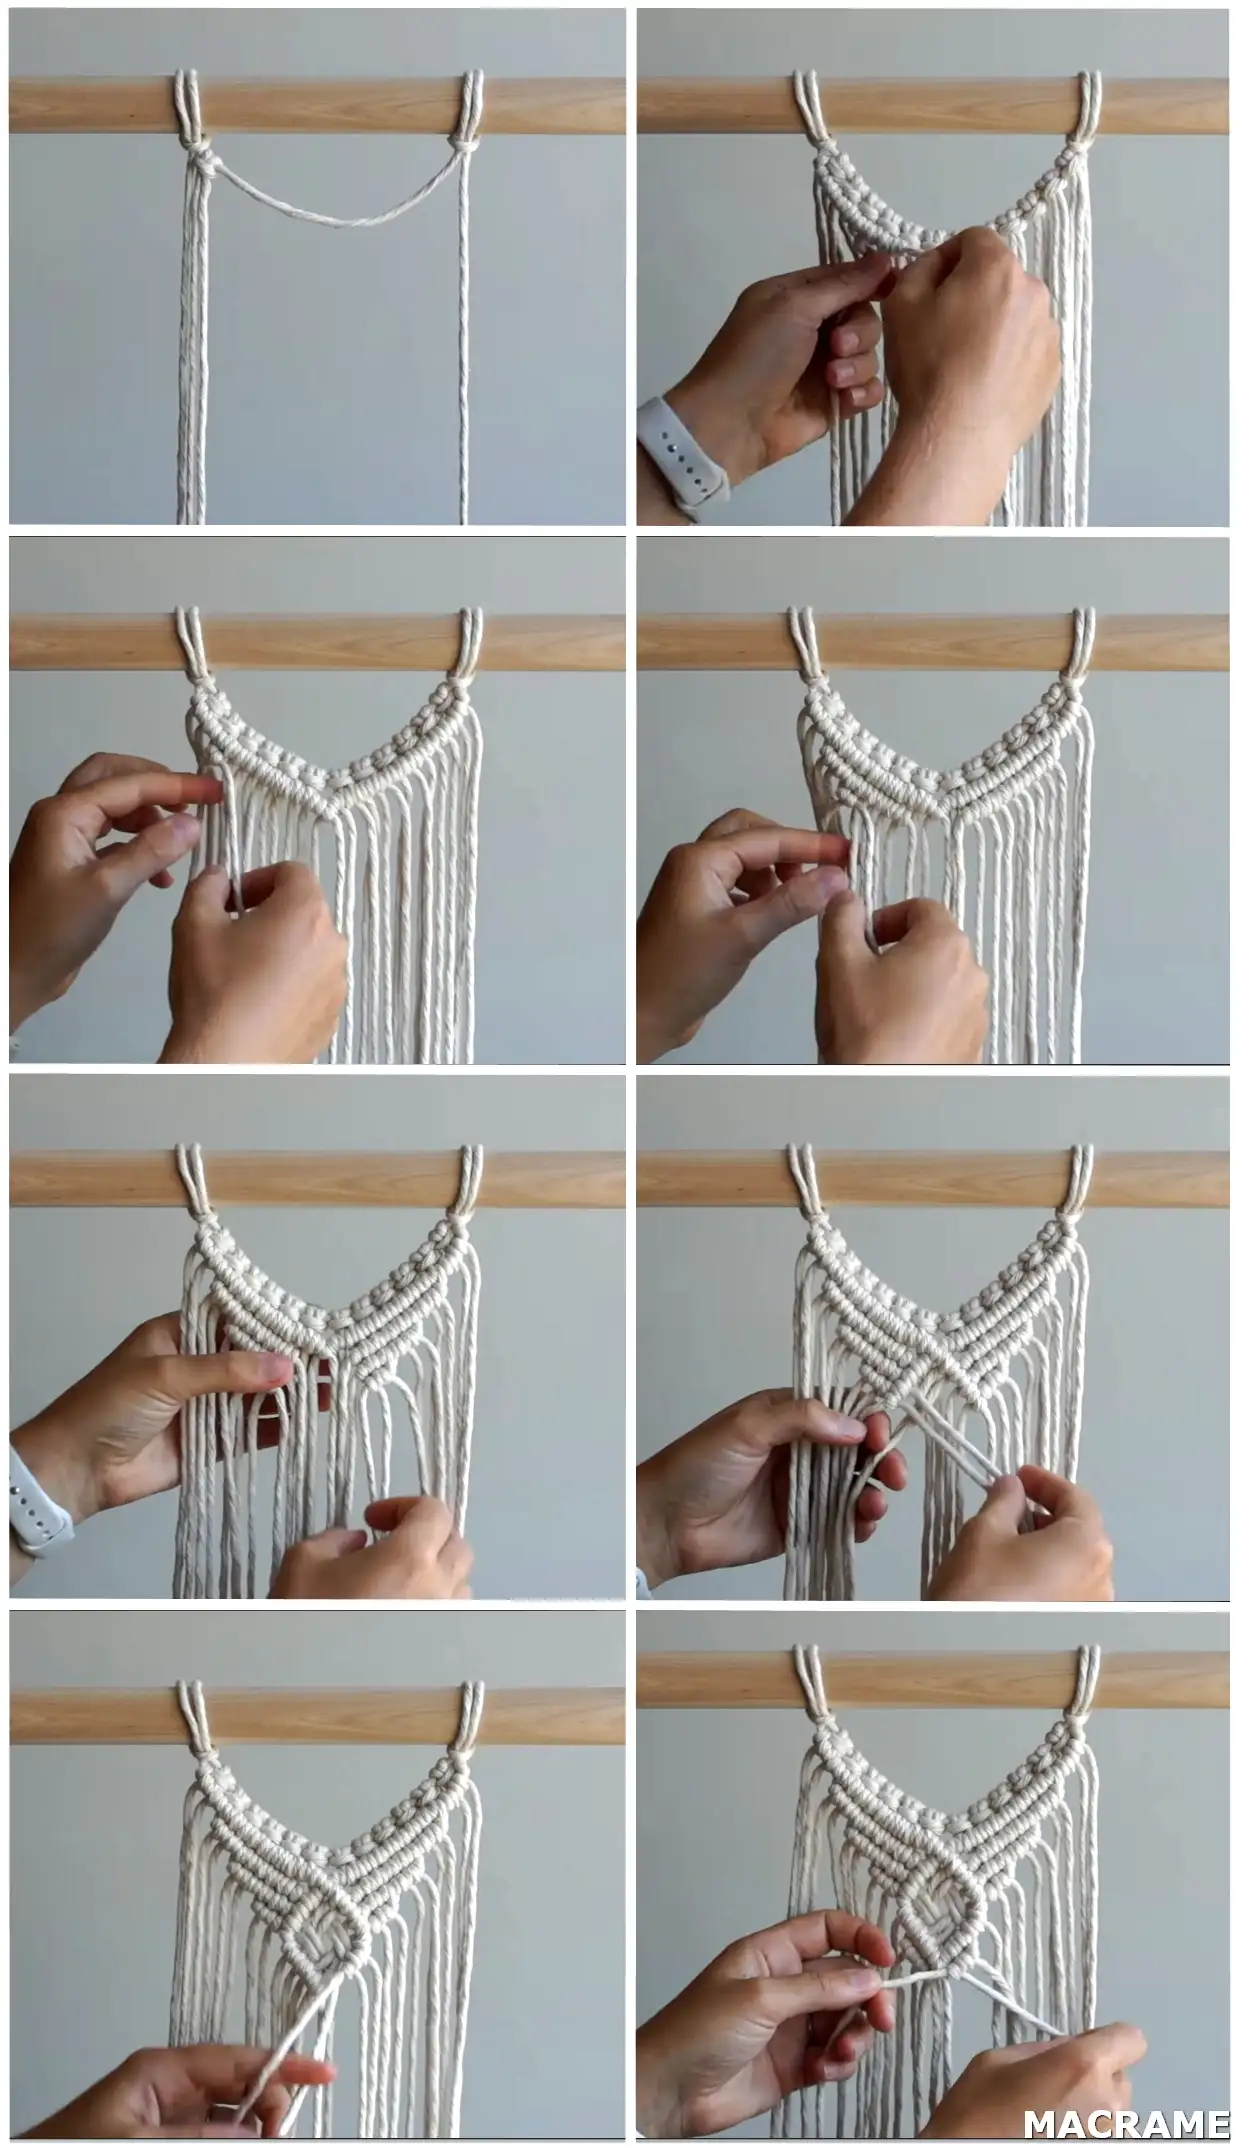
Using the outside left cord as your filler cord tie 12 double half hitch knots (DHHKs) moving to the right.
You can decide whether you want to keep the line of knots on a curve as seen here or push them down your filler cord to create a straighter line.
Repeat on the right side of your work.
Tie one more DHHK with the two middle cords.
We will tie another row of DHHKs on both sides of our work. Skip the first two cords and use the next cord as your filler cord. Tie 8 DHHKs moving to the right. Later on we will be tying a diamond in the middle of our work so we want to leave some space here for that.
Tie another row of DHHKs on both sides of your work. Skip the first two cords and use the next cord as your filler cord. Tie 5 DHHKs moving to the right.
Tie a final row of DHHKs on both sides of your work. Skip the first two cords and use the next cord as your filler cord. Tie 2 DHHKs moving to the right.
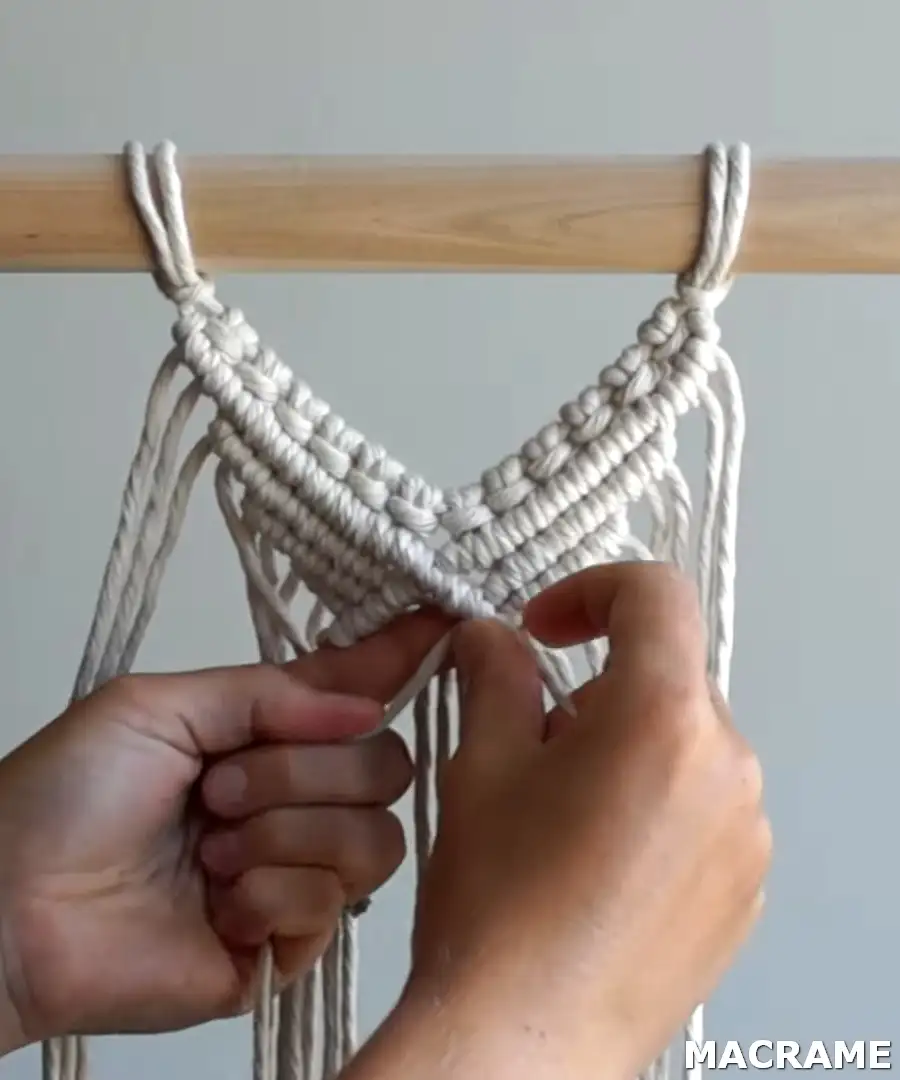
Using the inside left cord as your filler cord tie 4 DHHKs moving down and to the left. Repeat on the right side of your work.
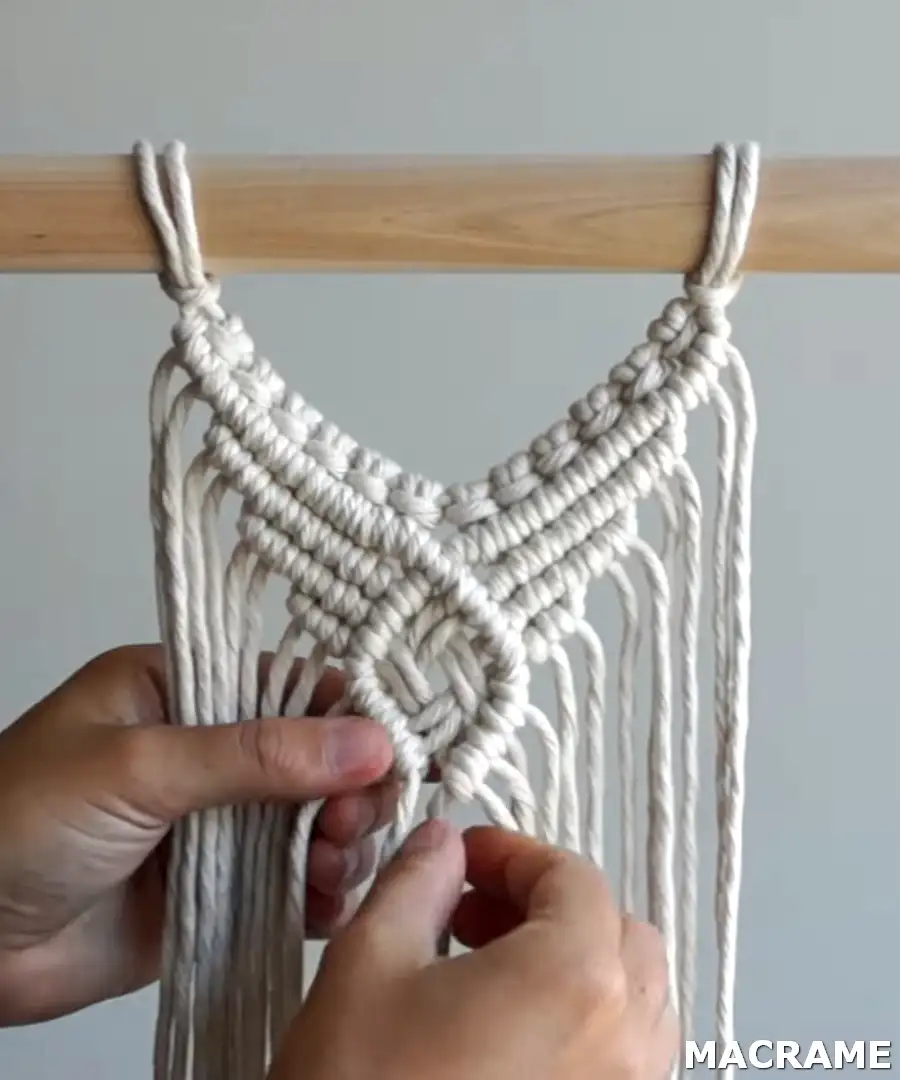
Feel free to create whatever design you’d like to the middle of your diamond - I am going to create a woven design by bringing the two inner right cords overtop then under the cords on the left before tying two DHHKs to start to form the bottom of my diamond. Bring the two outer right cords underneath then overtop of the cords on the left and then tie two DHHKs.
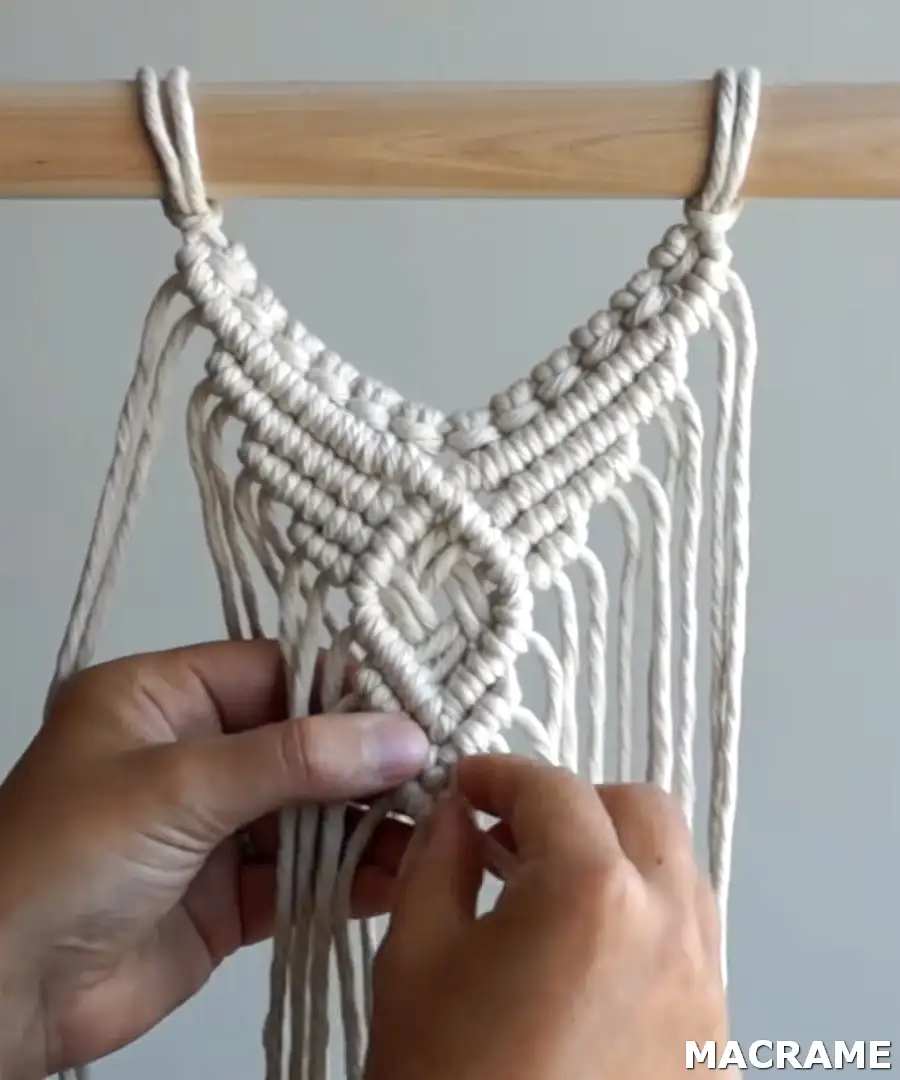
Tie 4 DHHKs on the right side of your work. Tie one more DHHK with the two middle cords.
Feel free to leave as is or if you want to add a little extra detailing follow along by adding DHHKs underneath the diamond. I’m adding two rows on both sides - the first row consists of 3 DHHKs then one extra DHHK to connect the sides and the second row consists of 1 DHHK then one extra DHHK to connect the sides.
https://youtu.be/pijPzoE6B6Q


Yorumlar
Yorum Gönder